Design
Process
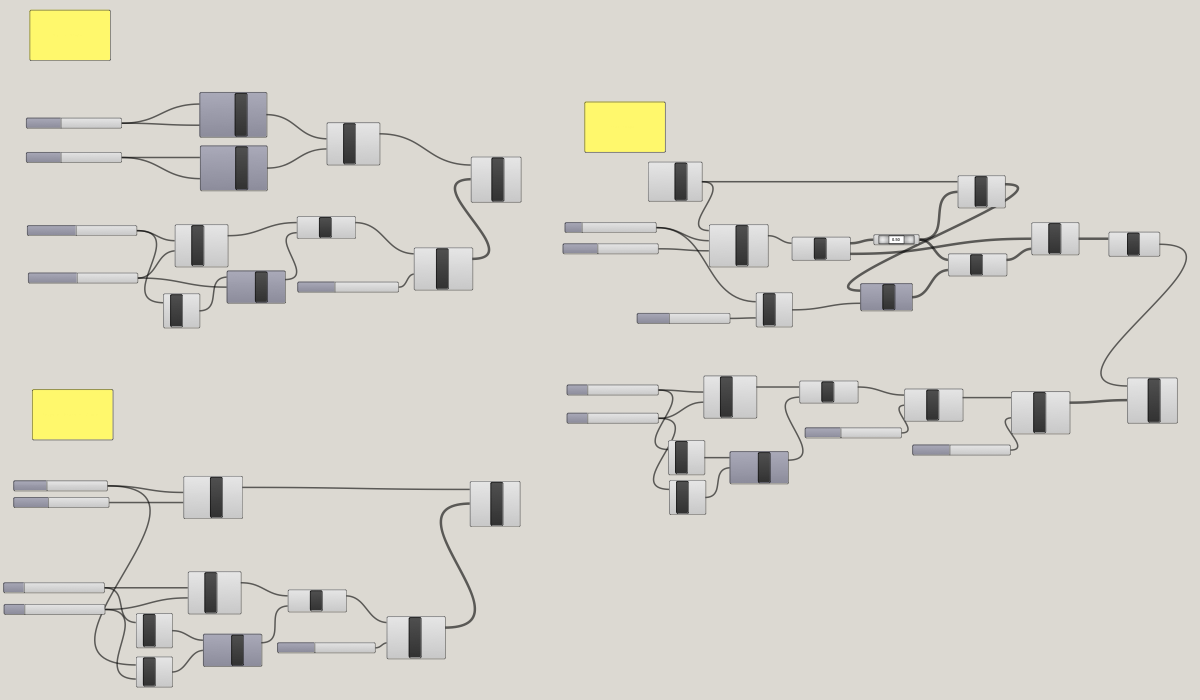
First things first, I needed to learn how to use Rhino and Grasshopper since CAD is new to me. I got a hang of Rhino from the in-class demo, but when we started Grasshopper, I was lost and confused. Fortunately, Nadya posted a tutorial on Slack, and I found it quite helpful! I followed along step by step to get a better understanding of parameters, components, functions, etc. Some parts I easily understood, and some parts I had to watch repeatedly or looked up additional information to understand. Videos, forums, and asking my friends questions were additional helpful resources to me.
Step 2: Recreating One Shape on Grasshopper
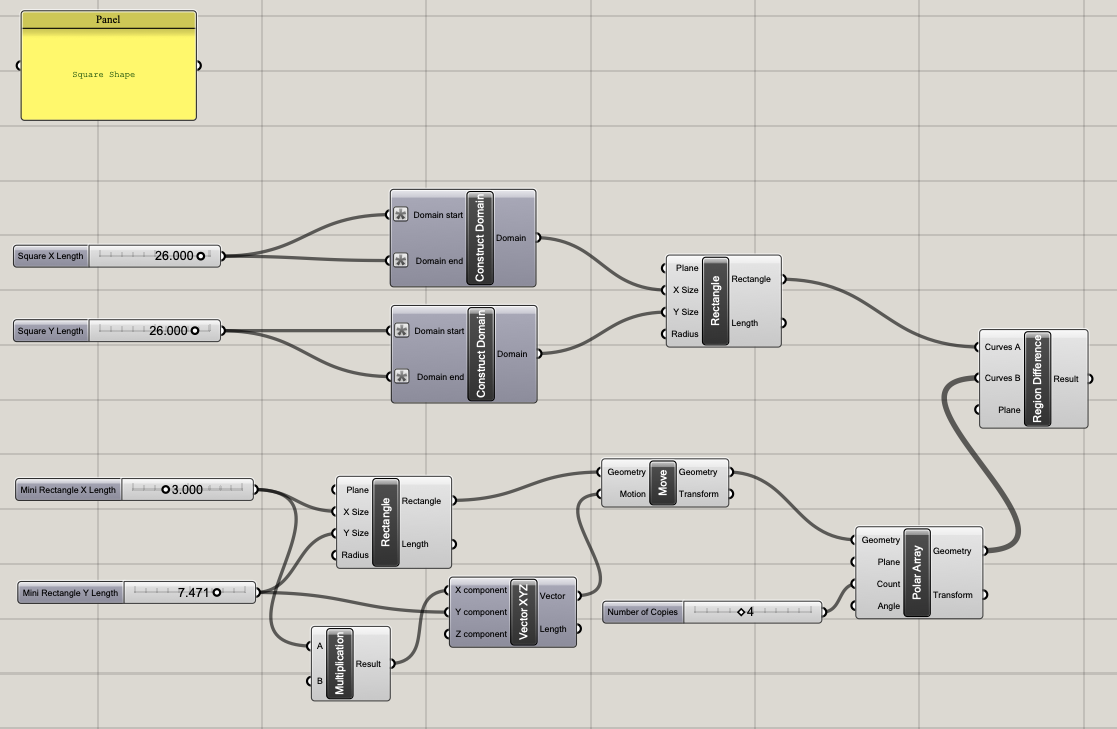
Once I understood Grasshopper better, I started recreating my shapes. I first started with the square. I followed Nadya's video to create the overall square and to make the rectangle for the slot as well as how to move the shape, polar array, and region difference.
The biggest problem I had was getting my rectangles to appear on the square after using polar array. The issue was that the bottom left part of the square was at (0,0) but the rectangles were rotated with a center at (0,0), so the rectangles were not sitting on the square.
I had to figure out how to center my square on (0,0).
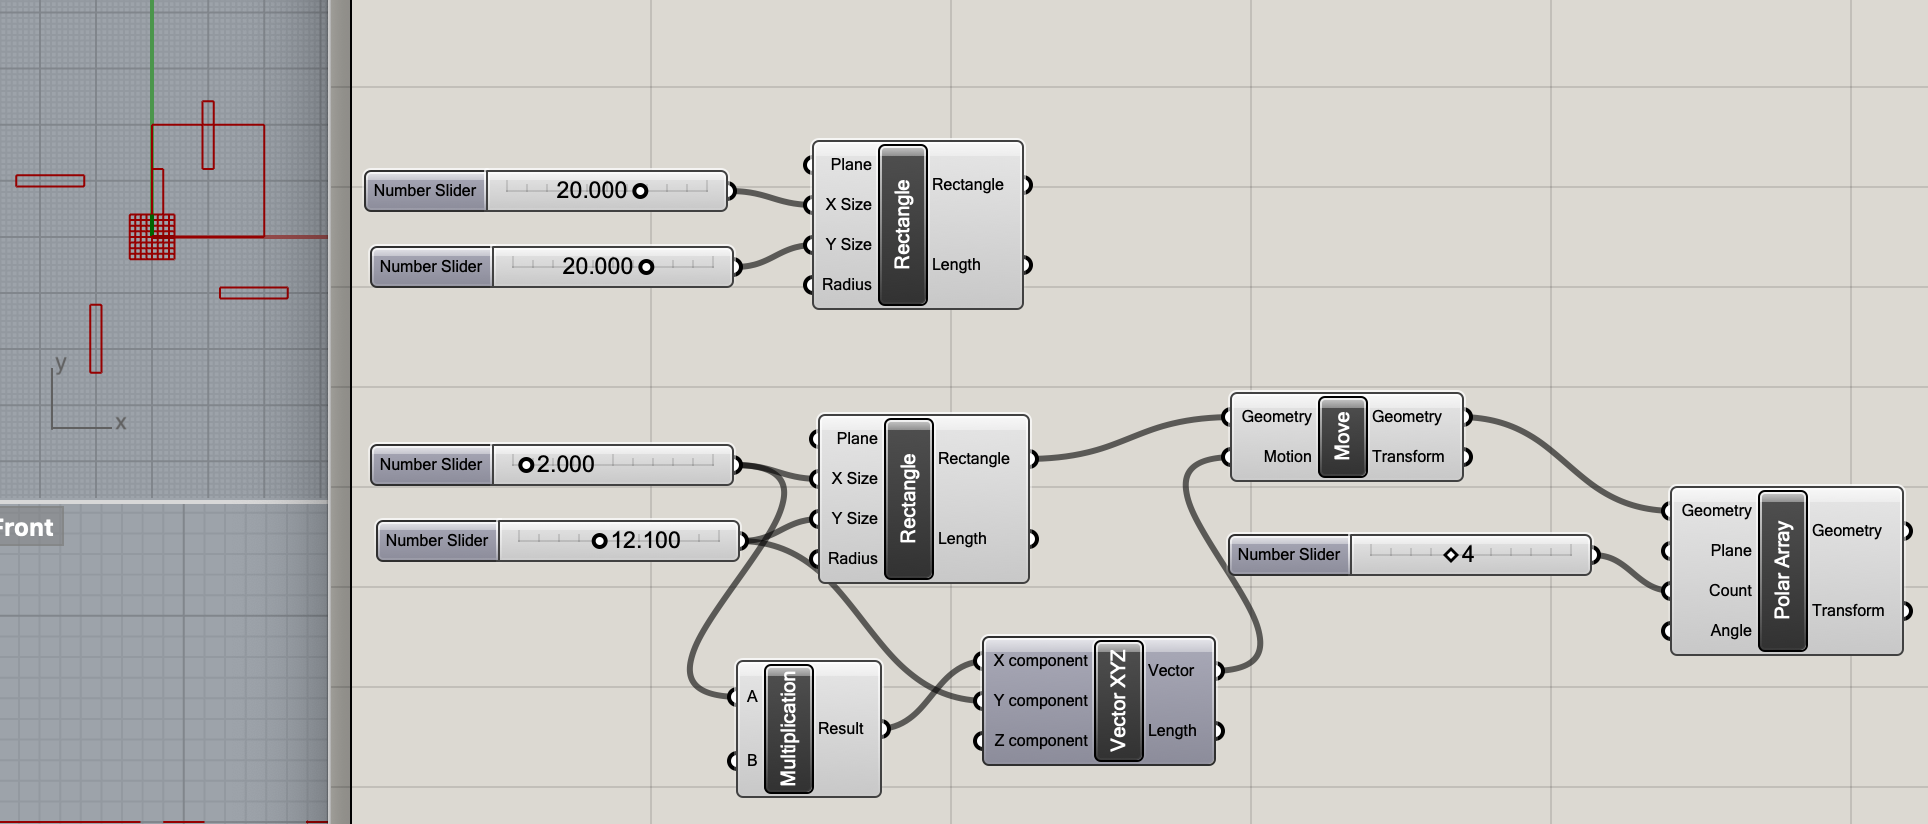
Snapshot of my issue
I had trouble figuring it out on my own, so I asked Elizabeth about it since she figured out how to do that. She told me to use construct domain to center my square on (0,0). Once I learned how to use construct domain, I was able to get my rectangles placed where I wanted them on the square with polar array. Other things I needed to figure out was the math in terms of using the move and vector XYZ tools. The multiplication for X was the same for each of my shapes fortunately, and I used what Nadya demo-ed to help me. With the Y length, it was a lot more trial and error for each shape. When I got the Y to how I personally wanted it, I went with it. I used region difference to subtract the shapes to create the slots and didn't have any issues with it. I baked the shape, went to see how it looked on Rhino, and was pleased!
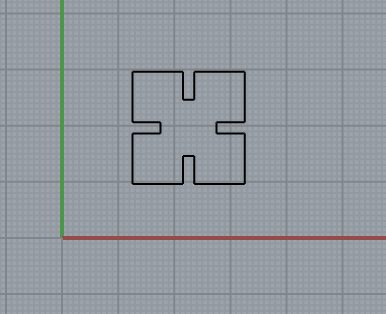
Square shape success using Grasshopper!
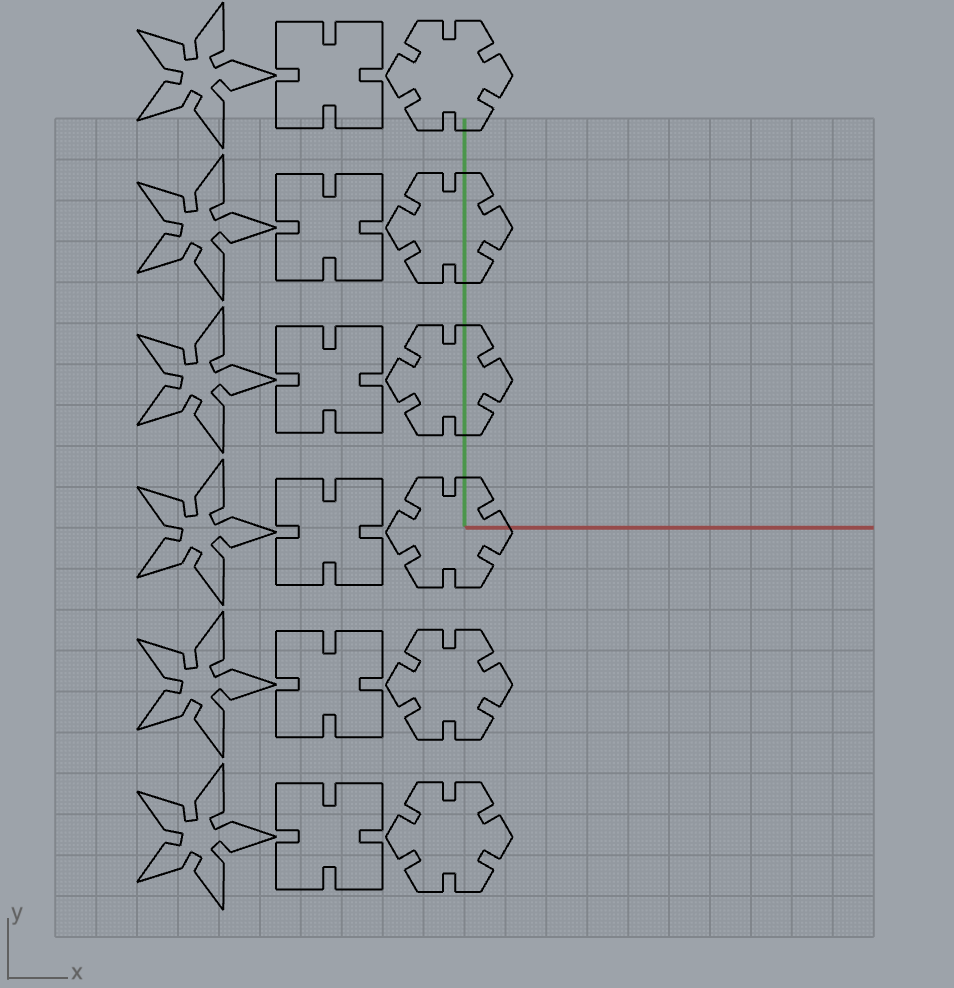
After the square success, I moved on to the polygon and star. I started with the polygon as there is a polygon tool on Grasshopper. For the polygon, I used the same process as the square and successfully recreated the hexagon. I added additional slots to the shape because I liked how it looked when I played around with polar array. Recreating the star was the most difficult of the 3 shapes. In Rhino, there is a way to create a star through the polygon tool, but with Grasshopper, it's a lot more complicated. I tried to figure it out on my own using polygon but got stuck after setting the number of segments. I did a Google search and found a forum where people posted different ways of creating a classic star. One person shared how they created it with various components. I utilized that source to recreate the star on my own trying my best to understand each piece. Once I got my star shape, creating the slots was easy. I figured out how to rotate the rectangle to place it where I wanted one of the slots on the star. The one hard part was when I used polar array to create copies of the rectangle. I had trouble with the math to only have 3 slots, so I ended up with 5 instead. Though I think it looks pretty cool with the additional slots. Just like the squares, I baked the polygon and star to Rhino to see how it looked.
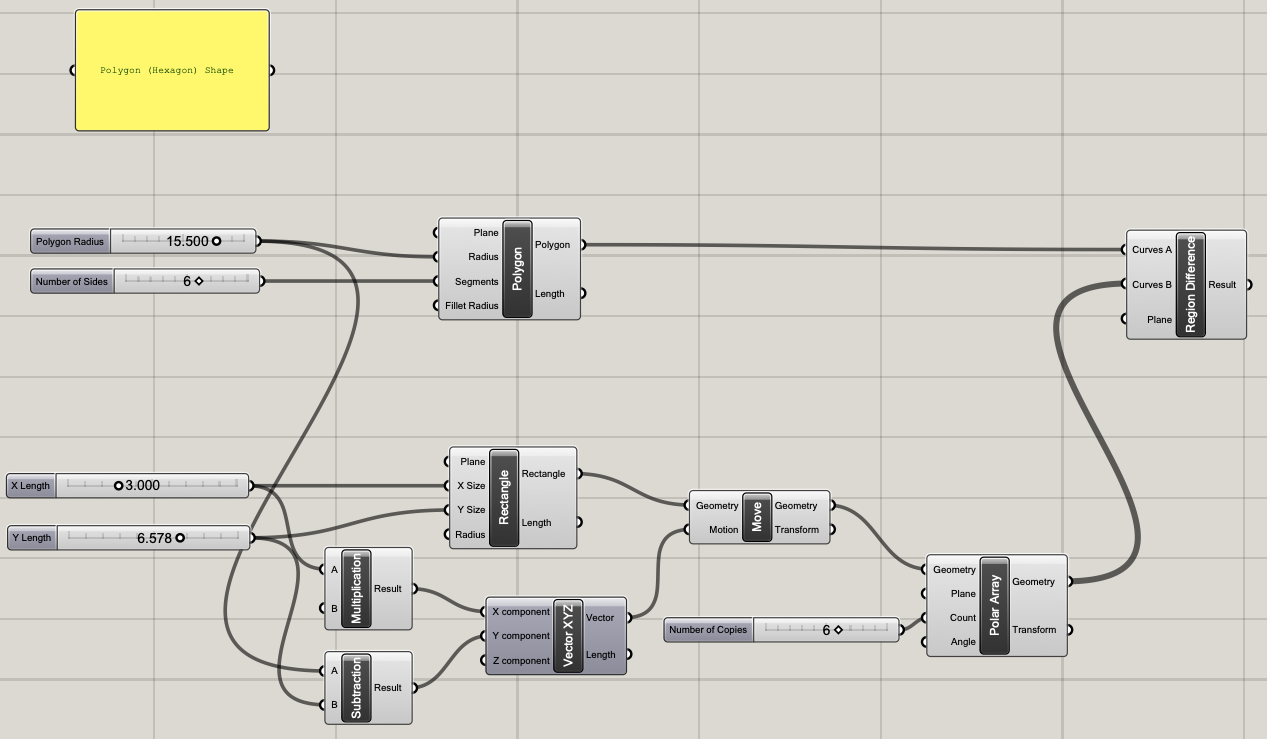
Polygon made with Grasshopper
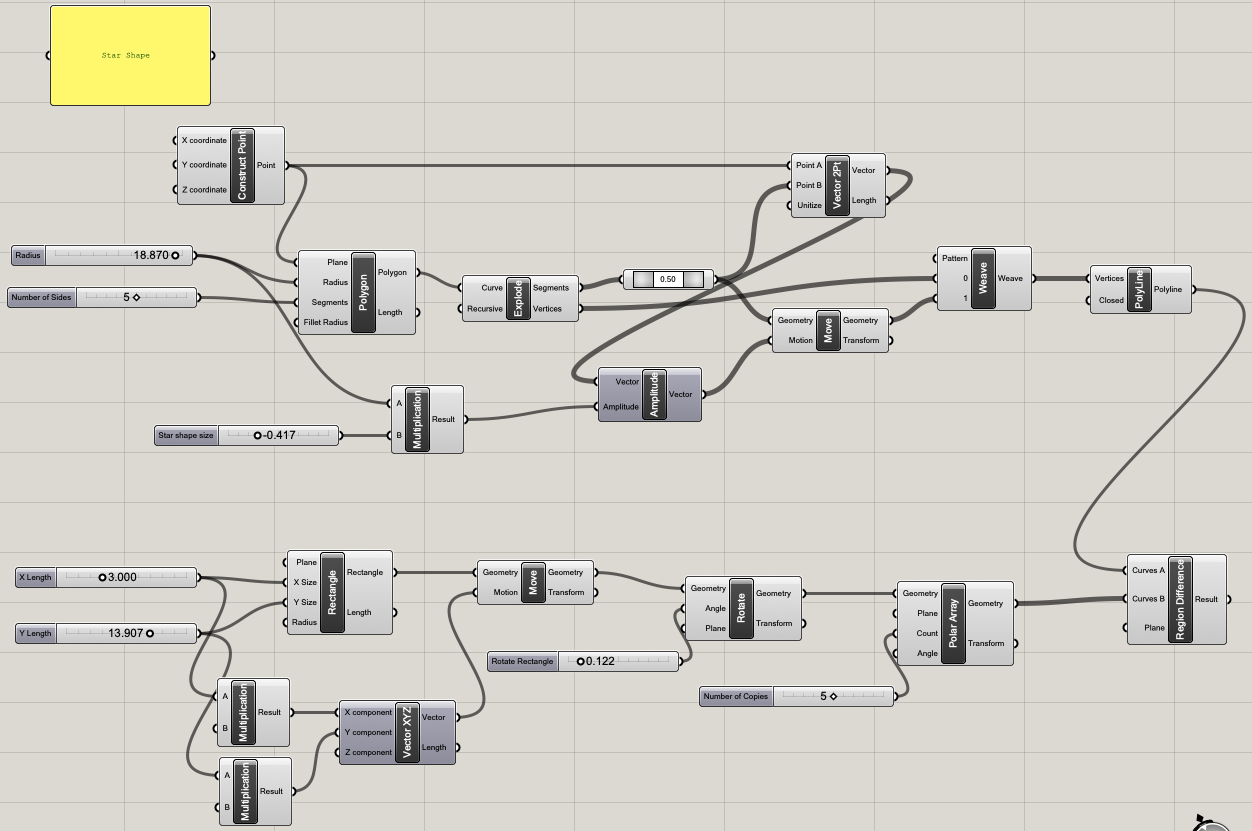
Star made with Grasshopper
Step 4: Sizing, Baking, Exporting & Laser Cutting the First Time
During the whole process, I didn't consider what the sizes of my shapes were.
I realized I needed to figure out the actual sizes of these shapes in order for the slots to fit together.
I asked Dave about sizing on Grasshopper, and he was the one who taught me that in Grasshopper it's in millimeters.
So the values on the number slider used for radius or length is the size in millimeters.
When I learned this, I opened my original Illustrator file to see the size of each shape in mm instead of inches.
Once I knew what I needed in mm, I adjusted the number sliders on Grasshopper for the lengths of the slots and baked each shape.
I had multiple copies of each shape and was ready to export. One error I made was that I wasn't paying attention when I first exported my file.
Instead of exporting 1mm = 1mm, I left it as 1mm = 1in.
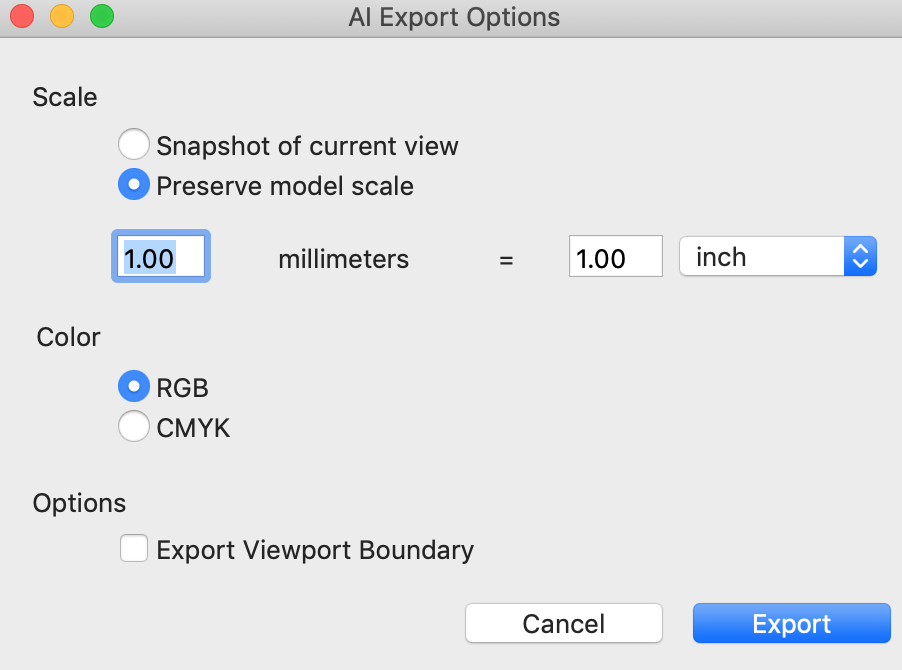
Exporting error. Didn't change inch to mm.
At first I couldn't figure out why my shapes were so large. Again, Dave was helpful and helped me realize this mistake! Once I fixed my error, I exported my Rhino file to Illustrator to laser cut the shapes. I started laser cutting with the thinner cardboard material I had. No issues this time with laser cutting, and my shapes easily fit together!
Laser Cutting Settings
Pieces put together.
I repeated the entire process of sizing, baking, exporting and laser cutting for the thicker cardboard material. I used my calipers to measure the cardboard. Adjusted the slot sizes accordingly on Grasshopper. Baked each shape and made multiple copies of each. Exported my file (correctly this time!). Opened it on Illustrator, adjusted the file accordingly, and laser cutted these shapes again with no problem!
Guide/forum to create a star: How to make a classic star
